Want secure, command-line access to your server or WordPress CLI? This step-by-step guide shows you how to connect using an SSH key – the safest method available.
🔒 Why Use SSH Keys for Server Access?
SSH (Secure Shell) keys offer a more secure way to access your server than traditional passwords. Instead of typing a password every time, you use a private key stored on your device and a public key stored on your server.
This method:
- Reduces brute-force attack risks
- Lets you safely use tools like WP-CLI
- Enables automated deployments and updates
Pressillion requires SSH key authentication for server access – no passwords allowed.
✅ Note: This guide is for Mac and Linux users. If you’re on Windows, use PuTTY or the Windows Subsystem for Linux (WSL).
🚀 Quick Overview: SSH Key Setup Steps
| Step | Task |
|---|---|
| 1 | Open Terminal |
| 2 | Generate an SSH Key |
| 3 | Copy the Public Key |
| 4 | Upload Key to Pressillion |
| 5 | Assign Key to a Server |
| 6 | Connect via Terminal |
🧪 Step-by-Step Instructions (Mac/Linux)
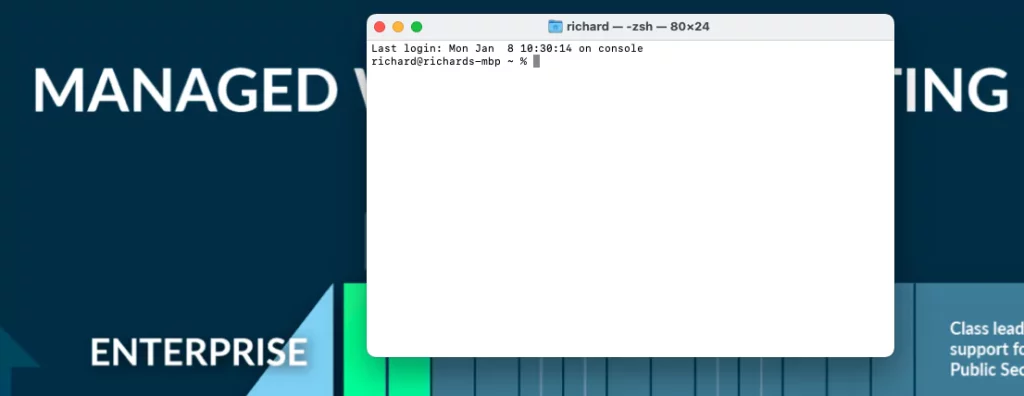
✅ Step 1: Open Terminal
Click the magnifying glass icon in the top right corner of your screen and type:
Hit Enter to open the Terminal app.
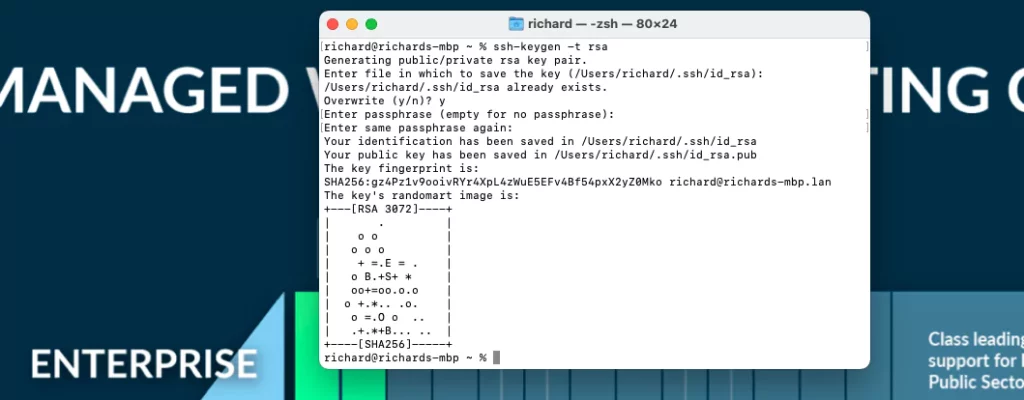
✅ Step 2: Generate Your SSH Key Pair
In Terminal, run the command:
ssh-keygen -t rsaWhen prompted for a file location, press Enter to accept the default:
/Users/yourname/.ssh/id_rsaYou can add a passphrase or just press Enter again to skip.
This generates:
id_rsa– your private key (keep this safe)id_rsa.pub– your public key (safe to share)
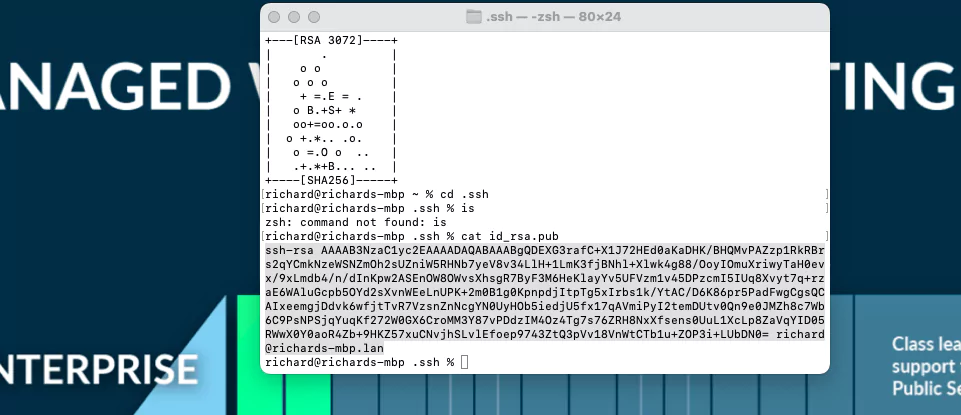
✅ Step 3: Copy Your Public Key
Go to your .ssh directory:
cd ~/.sshList the files:
lsDisplay your public key:
cat id_rsa.pubCopy the entire output (it starts with ssh-rsa).
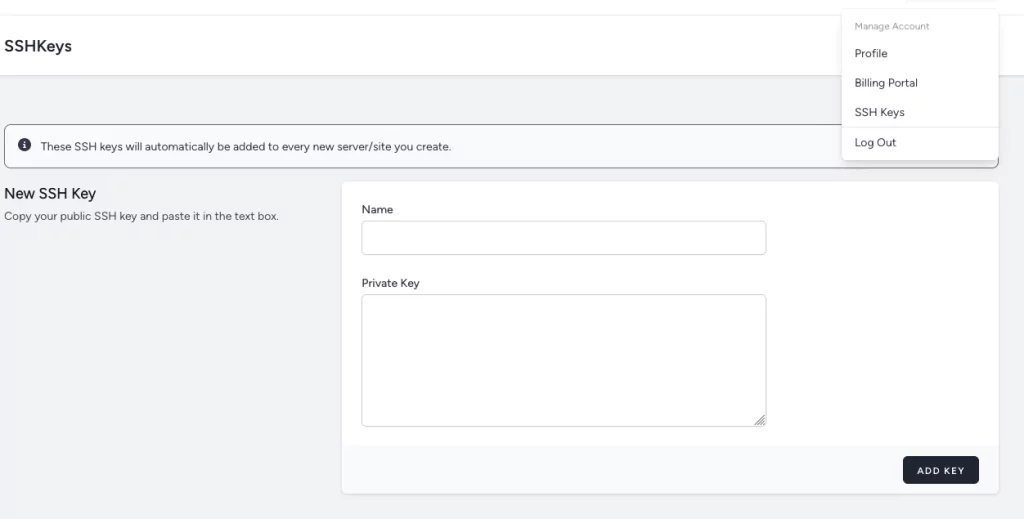
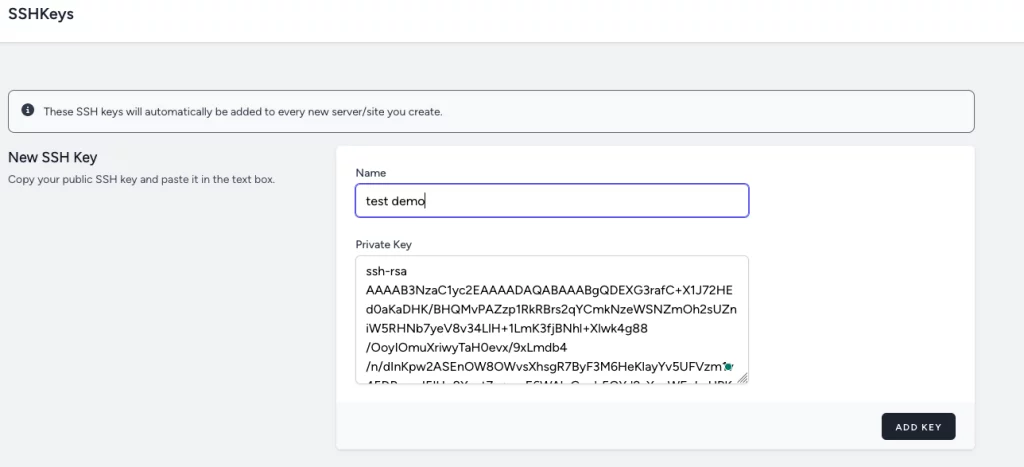
✅ Step 4: Add the Public Key to Pressillion
- Log into your Pressillion dashboard
- Click your username in the top-right corner
- Go to SSH Keys
- Click New SSH Key
- Enter a name and paste the public key
- Click Add Key
✅ Step 5: Assign the Key to Your Server
- Go to the Servers section in Pressillion
- Select your server
- Click the SSH tab
- Select your key from the list and click Add to Server
Need help? See Adding & Removing SSH Keys on Your Server.
✅ Step 6: Connect to Your Server via Terminal
In Terminal, connect using this format:
ssh root@your.server.ip.addressIf it’s your first time connecting, confirm the authenticity prompt:
yesOnce connected, run commands like:
wp plugin list💡 Bonus Tips
- Never share your private key (
id_rsa) - Generate unique keys for each device
- Use
ssh-addto store keys in macOS Keychain - Remove keys anytime via the Pressillion dashboard
🤔 Frequently Asked Questions
Why doesn’t Pressillion support password login?
Because SSH keys are more secure. Passwords are easily brute-forced, keys are not.
Can I use the same key on multiple servers?
Yes. Add the key to your account once, then assign it to as many servers as needed.
What if I already have an SSH key?
No problem. Skip Step 2 and just upload your existing id_rsa.pub.
What happens if I lose my private key?
You’ll need to generate a new one and re-add the public key in your account.
How do I revoke access?
Remove the key from your account or unassign it from the specific serve
✅ Recap
- Generate a key with
ssh-keygen -t rsa - Copy the public key using
cat id_rsa.pub - Upload it to your Pressillion dashboard
- Assign it to your server
- Connect securely with
ssh root@your.server.ip.address
You’re now ready to work with WP-CLI, secure scripts, and server management – no password required.
Sources:
- OpenSSH Manual – ssh-keygen
- WordPress.org – WP-CLI
- GitHub Docs – Generating a new SSH key
- DigitalOcean SSH Tutorial