In this guide, we’ll explore the free version of WPvivid – a versatile plugin that makes WordPress migration a walk in the park.
WPvivid Free vs Pro
Before diving in, let’s peek at what the free plugin offers.
The Pro version boasts exciting additional features, including integration options for Google Drive, Dropbox, OneDrive, Amazon S3, and more. It’s like unlocking the deluxe edition, with added perks like multisite options.
Step 1. Set up Your Destination Server and Site
To kickstart your migration journey, ensure you’ve provisioned a server in your Pressillion account to host your site.
Haven’t done it yet?
Don’t fret; we’ve got user-friendly guides to help you set the stage.
Step 2. Install WPvivid on Both Websites
Grab the WPvivid plugin from the WordPress repository and flex those installation muscles.
Activate it on both the origin and destination websites for a smooth migration experience.
Before You Proceed
A quick heads-up!
We recommend disabling all caching mechanisms and redirect/security plugins on both ends before diving into the migration process.
It’s like clearing the path before a marathon—ensures a smoother run.
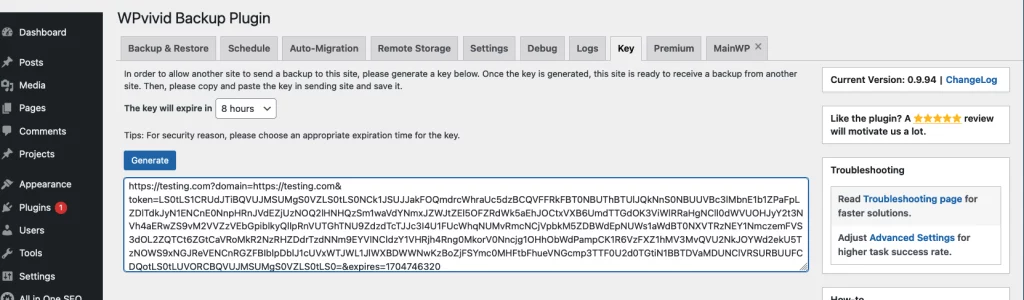
Step 3. Get Your Auto-Migration Site Key
At the destination site:
- Head over to the Key tab page in the WPvivid backup plugin.
- Click that ‘Generate’ button and copy the shiny new key.
Step 4. Add Your Key to the Origin Site
Now, let’s swing back to the origin site’s Auto-Migrations tab:
Paste the key into the designated box and hit ‘Save’.

You’ll get a confirmation that the sites are well-connected, along with the key’s expiration countdown.
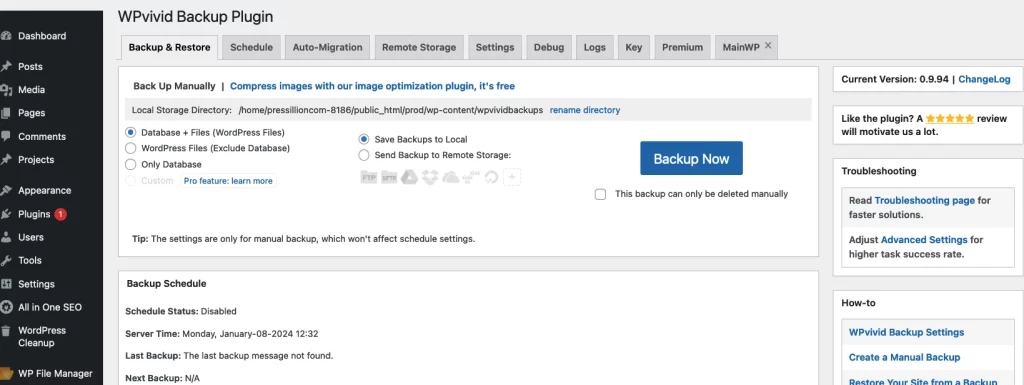
Step 5. Start Your Migration
It’s decision time! Select your preferred migration option—Database + Files, WordPress Files, or Only Database—and hit the big, blue ‘Clone then Transfer’ button to launch the migration.

Watch the progress bar dance as your website elements shimmy across servers:
Once done, you’ll see a notification prompt—click ‘OK’ and swiftly head back to the destination site to wrap things up.
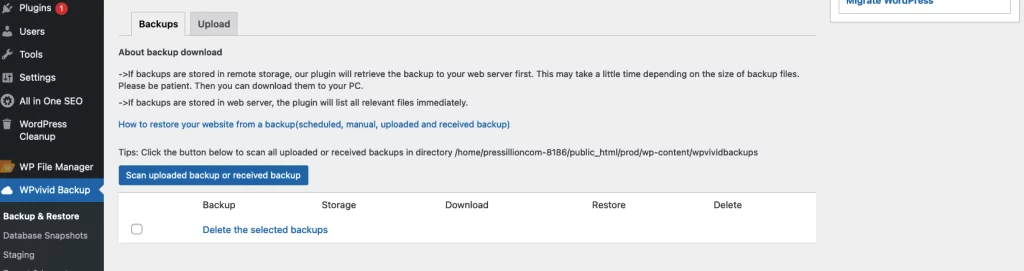
Step 6. Complete Your Migration
At the destination website’s Backups & Restore tab:
- Hit ‘Scan uploaded backup or received backup’ to unveil the transferred backup.
- Click ‘Restore’ to proceed with the final steps.
Remember, during the restoration process, avoid any page hopping or tab shuffling to prevent unexpected errors.
Keep an eye on the progress bar for updates:
Once done, a joyous message will greet you: “Restore completed successfully.”
Restore Failures
If things hit a snag during restoration, check your website’s error log. Often, critical errors emerge due to host-specific plugins or tweaks in the website’s core codebase by previous hosts. Identifying these hiccups is crucial to a seamless migration.
Step 7. Check Your Website
With the restoration complete, it’s showtime!
Log into your website and scrutinize every nook and cranny to ensure everything is humming along smoothly.
Re-enable those plugins and, once satisfied, unleash the caching magic again.
That’s it! Your migration journey with WPvivid has reached a successful endpoint.
Happu WordPressing!