Brace yourselves for a migration adventure with Migrate Guru, the Swiss Army knife of WordPress site transfers.
If Gandalf were guiding your site to a new WordPress hosting home, Migrate Guru would be his staff!
How To Migrate Your Existing Sites – Migrate Guru
Migrate Guru is the gold standard for reliability and user-friendliness when it comes to migrating WordPress sites.
It’s handled mammoth 65GB news publisher websites, intricate 950+ website networks, and pretty much any website you could dream up.
Even for colossal sites, though it might take a day (or more), it’s as reliable as the North Star and completely free.
Trust us, once you’ve made your first migration, future migrations will feel like a breeze.
Origin and Destination Note
We’ll refer to the site you’re moving as the origin site and the new site/server as your destination. Got it? Awesome!
Multisite Notice
If you’re dealing with a multisite, ensure you toggle on the right multisite setting in your website customizer before you dive in.
Pro tip: Double-check the URL settings, don’t go the temporary route, and redirect your local hosts for post-migration checks.
Migration Options: Migrate Guru Key vs SFTP Credentials
Migrate Guru offers two migration methods. The original used SFTP details of the destination site. The newer, cooler method uses a nifty key/token system, making migration as smooth as silk. We’ll cover both methods in this walkthrough.
Step 1. Set Up Your Destination Website
Before the migration magic begins, ensure you have a server and destination website set up.
Need guidance? Check out these starter articles:
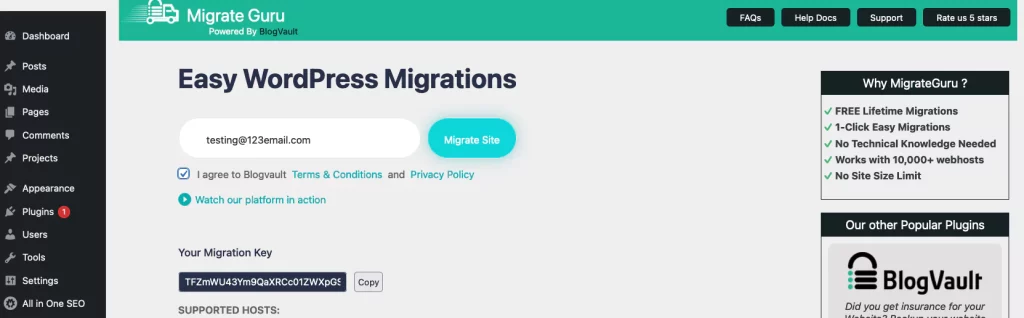
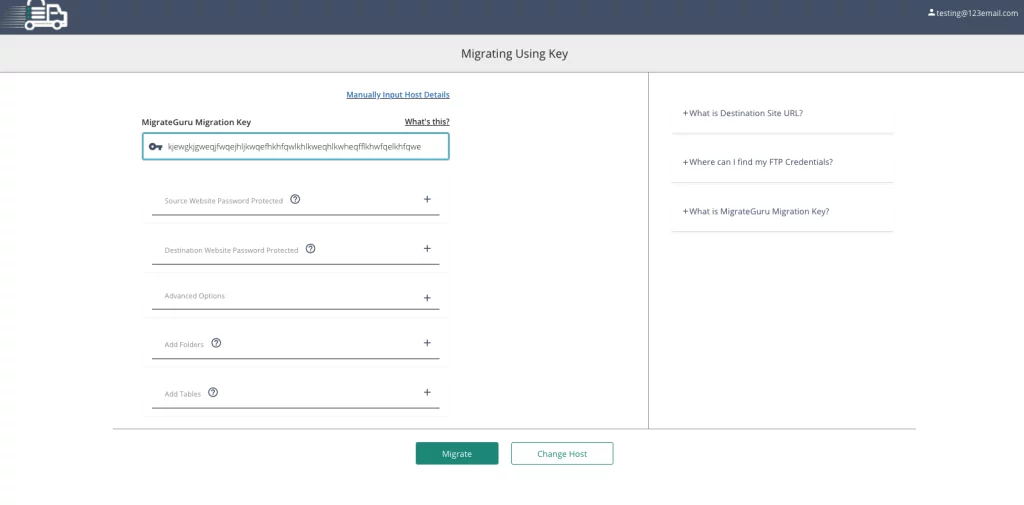
Migrate Guru Key
If you’re opting for the token method, log in to your destination website, install Migrate Guru, and create your migration key.

Copy it like a pro!
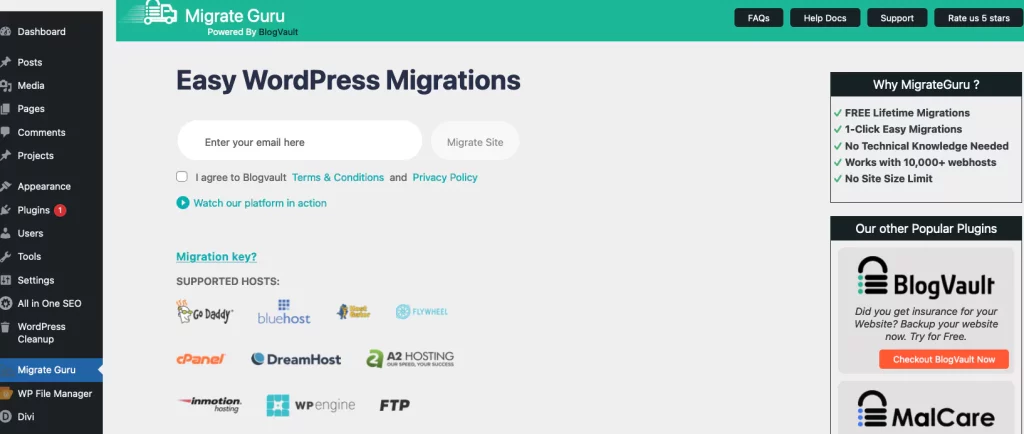
Step 2. Configure Your Origin Website
Now, switch gears to your origin site. Install and activate Migrate Guru, add your email, agree to the terms & conditions, and choose “Other Host” (or something similar).
Step 2.1 Key Method Configuration
Got your key? Easy-peasy! Enter it in the migration configuration, click ‘Migrate’, and watch the migration get started.
Step 2.2 SFTP Method Configuration
For the SFTP aficionados, switch to manual input, and carefully fill in your destination site’s details.
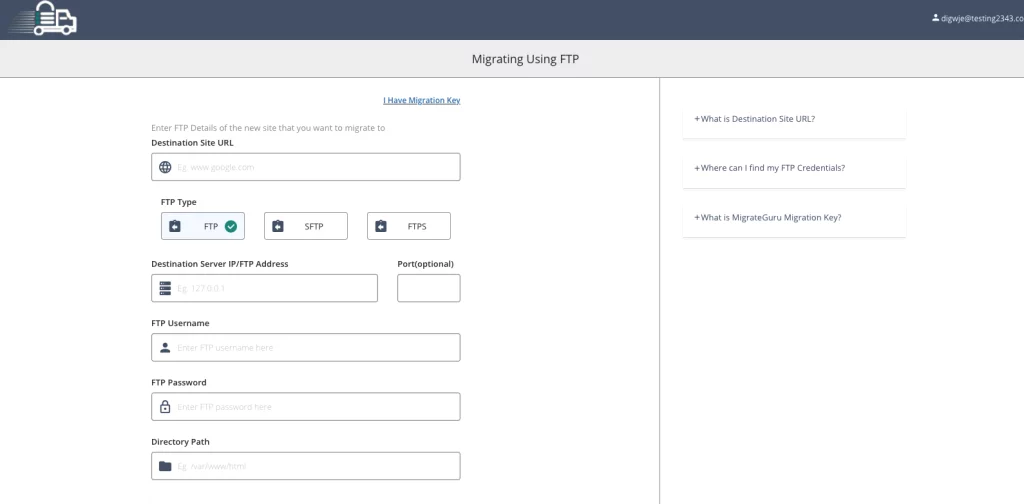
Channel your inner Sherlock and ensure accuracy though!
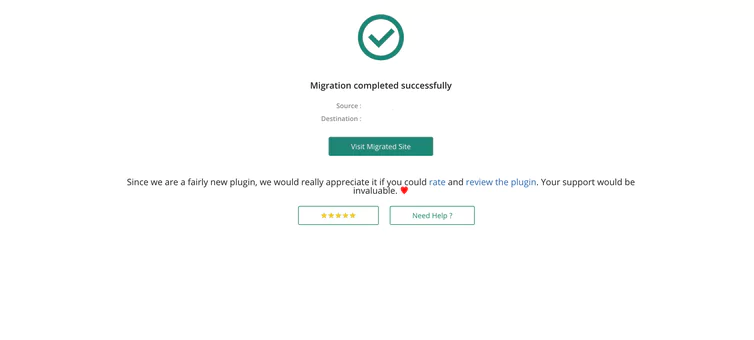
Step 3. Start Your Migration
Once everything’s in place, hit ‘Migrate’ to start the show.
A confirmation screen should pop up, signaling your migration is completed.
Step 4. Test Your Site on Pressillion
Verify the migration by checking both the front end and the dashboard on Pressillion.
Use your local host for URL redirection.
Once it’s confirmed, flip the site’s DNS to your server like a boss.