Are you facing the frustrating thought of how to fix the “Installation Failed: Could Not Create Directory.” error while trying to install or update plugins or themes on your WordPress site?
Fret not; this common issue is often related to file permissions and can be swiftly resolved.
Troubleshooting the “Installation Failed: Could Not Create Directory” Error in WordPress: A Comprehensive Guide for Seamless Resolutions
In this comprehensive guide, we’ll walk you through two effective methods to diagnose and fix this error, ensuring a smooth WordPress experience.
Understanding the Error: Diagnosing File Permissions
Before delving into the solutions, it’s essential to diagnose whether the error is indeed related to file permissions.
We’ll explore two reliable methods to assess and confirm the source of the problem.
-
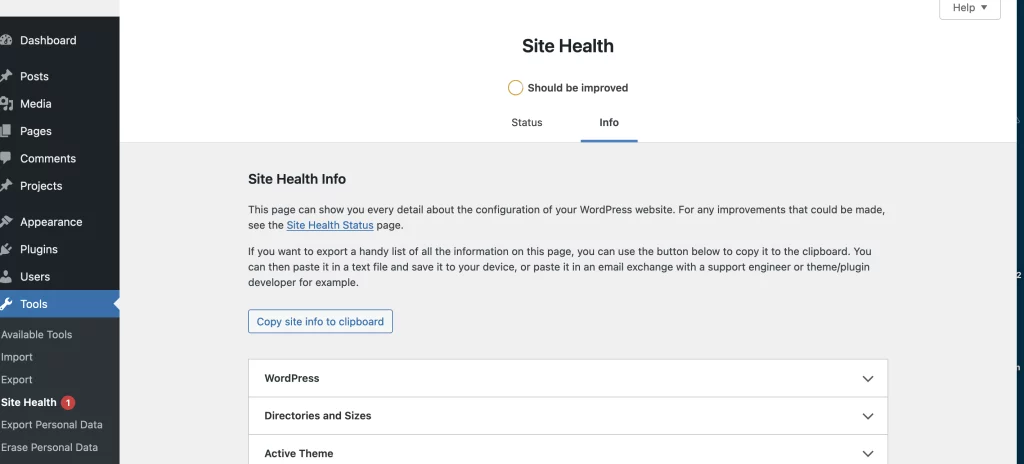
Utilizing the WordPress Site Health Tool
WordPress 5.2 introduced the Site Health tool, a powerful feature offering insights into your site’s performance, security, and configuration data. To check your file permissions settings:
- Navigate to Tools > Site Health in your WordPress dashboard.
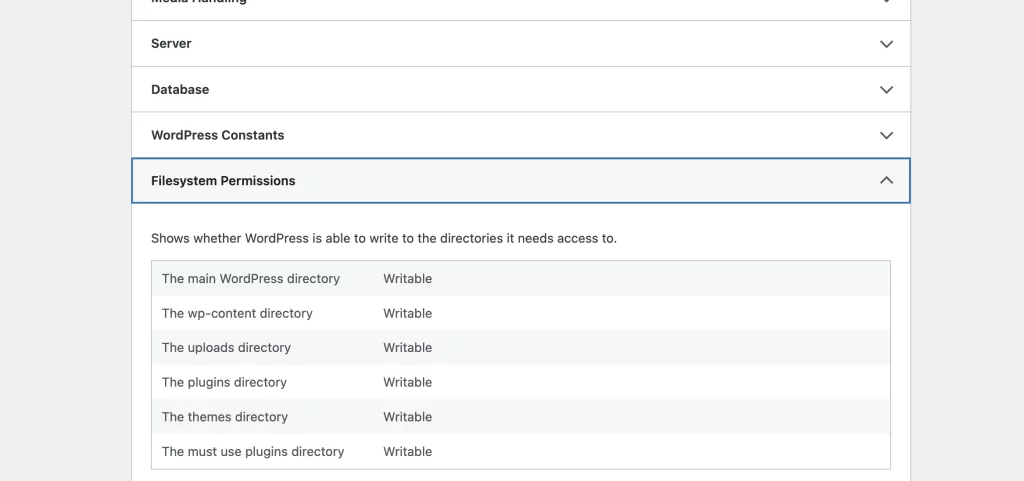
- Click on the Info tab and scroll down to the Filesystem Permissions section.
- Check if crucial WordPress directories are listed as “Writable.” Incorrect permissions will be flagged as “Not writable.”
This provides a quick overview of your site’s file permissions health. If any directories are marked as “Not writable,” you’ve identified a permissions issue.
-
Examining Your Server’s Error Log
An alternative and efficient method involves checking your server’s error log. This approach reveals a broader spectrum of errors beyond file permissions.
For Pressillion users:
- Log in to your dashboard, select the relevant site, and go to the Logs tab.
If you spot relevant errors, proceed to rectify file permissions or consider upgrading your hosting plan if storage issues are indicated.
Resolving the “Installation Failed: Could Not Create Directory” Error
Now that you’ve diagnosed a file permissions issue as the cause, let’s move on to the solutions. If your site is hosted on Pressillion, you can use FileZilla or another FTP client to reset permissions. Always create a backup before making any changes.
-
Connect to Your Server via FTP
- Access your FTP credentials from your dashboard’s Info tab.
- Open FileZilla, enter your credentials, and connect to your server.
- Navigate to the public_html folder.
If files are not visible, show hidden files in Filezilla. Select wp_content, wp_includes, and wp_admin, right-click, and choose File Permissions.
-
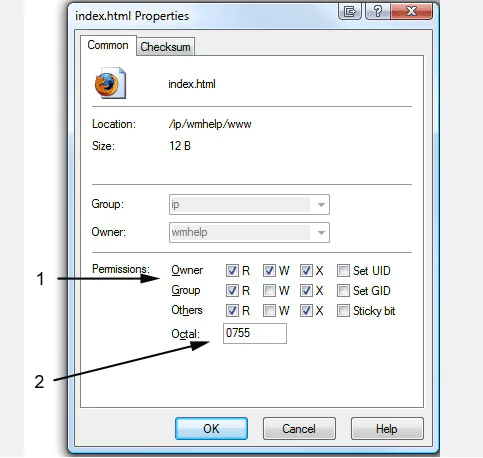
Adjust File Permissions
In the permissions window:
- Set Owner Permissions to Read, Write, Execute.
- Set Group Permissions to Read, Execute.
- Set Public Permissions to Read, Execute.
- Ensure the Numeric value is 755.
- Select “Recurse into subdirectories” and “Apply to directories only.”
Click OK to apply the changes. Return to your site and attempt the installation/update again.
Note: Some hosting providers, including those with cPanel, offer tools within their dashboards for managing file permissions without FTP/SFTP.
Summary: Ensuring Smooth Plugin and Theme Installations
Encountering the “Installation Failed: Could Not Create Directory” error can be a hindrance to your WordPress workflow. By utilizing the Site Health tool or checking the server’s error log, you can quickly identify file permissions issues. Once confirmed, resetting permissions via FTP/SFTP resolves the problem efficiently.
Your plugins and themes play a crucial role in your site’s functionality, so ensuring seamless installations and updates is paramount. With these straightforward diagnostics and solutions, you can maintain a well-functioning WordPress site without unnecessary interruptions.