In this tutorial, I’ll walk you through the steps to fix Fatal Error: Maximum Execution Time Exceeded in WordPress
So you have encountered the “Fatal Error: Maximum Execution Time Exceeded” message when trying to perform an action on your WordPress website?
If so, you’re not alone.
This error message appears when a script exceeds the maximum execution time limit set by the server.
What Causes the Maximum Execution Time Exceeded Error?
Before we dive into the solution, let’s first understand what causes the “maximum execution time exceeded” error.
By default, PHP scripts are allowed to run for a maximum of 30 seconds.
If a script takes longer than 30 seconds to complete, it triggers the “maximum execution time exceeded” error.
This error can occur when:
Uploading a large file
Importing or exporting a large database
Executing a complex query
Running a heavy script
Now that we understand what causes this error, let’s move on to the solution.
How to Fix Fatal Error: Maximum Execution Time Exceeded
There are two ways to fix the “maximum execution time exceeded” error:
Method 1: Editing the php.ini File
The php.ini file is a configuration file for PHP. By editing this file, we can increase the maximum execution time limit.
Here’s how to do it:
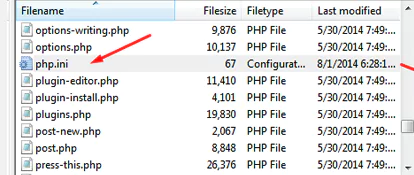
Step 1: Locate the php.ini File
First, we need to locate the php.ini file.
The location of this file depends on your web host.
You can contact your web hosting support team to find out where this file is located.
Step 2: Edit the File
Once you’ve located the php.ini file, open it in a text editor and find the following line:
max_execution_time = 30
Change the value from 30 to a higher number, such as 120.
Save the file and close it.
Step 3: Restart the Server
After editing the php.ini file, we need to restart the server for the changes to take effect. You can do this through your hosting control panel or by contacting your web host’s support team.
Method 2: Editing the .htaccess File
The .htaccess file is a configuration file for Apache web servers. By editing this file, we can increase the maximum execution time limit.
Here’s how to do it:
Step 1: Locate the .htaccess File
First, we need to locate the .htaccess file. This file is usually located in the root folder of your WordPress installation.
Step 2: Edit the File
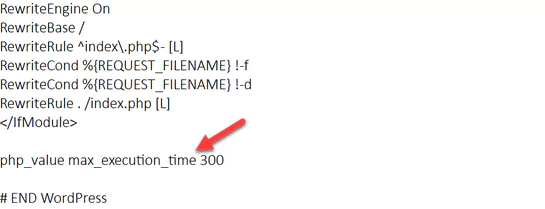
Once you've located the .htaccess file, open it in a text editor and add the following line at the end of the file:

php_value max_execution_time 120
This sets the maximum execution time to 120 seconds. You can change this value to any number you like.
Step 3: Save and Close the File
Save the file and close it.
Testing the Fix
After making the changes, test to see if the error has been resolved by performing the action that triggered the error.
If the error persists, you may need to contact your WordPress web host’s support team for further assistance. I hope this tutorial helped you fix the “maximum execution time exceeded” error in WordPress.