Syntax errors are among the most common issues WordPress developers and site owners face. These errors stop your website’s code from running properly and can make your site inaccessible or display error messages. Fortunately, fixing a syntax error is often straightforward once you know how to locate and correct it.
In this comprehensive guide, we’ll explain what syntax errors are, why they happen, and step-by-step how you can resolve them quickly and prevent them in the future. Whether you’re a developer or a site owner, this tutorial will help you regain control of your WordPress site and keep it running smoothly.
Table of Contents
- What is a Syntax Error in WordPress?
- What Causes Syntax Errors in WordPress?
- Step 1: Identify the Error
- Step 2: Correct the Syntax Error
- Step 3: Prevent Future Syntax Errors
- FAQ
- Sources
What is a Syntax Error in WordPress?
 A syntax error in WordPress happens when the code contains mistakes that break the execution of scripts. This is a very common error and can cause:
- The infamous “white screen of death” (a blank white page)
- Error messages appearing on your site
- Inability to access the WordPress admin dashboard
Syntax errors occur when the PHP code does not follow the proper language rules, such as missing semicolons, mismatched brackets, or misspelled commands.
What Causes Syntax Errors in WordPress?
There are several common causes of syntax errors in WordPress sites:
- Typos or incorrect syntax in PHP code added to themes, plugins, or custom scripts.
- Incompatible or poorly coded plugins or themes that introduce syntax mistakes.
- Incorrect server configurations or PHP versions that conflict with your code.
Usually, syntax errors happen during custom code edits, plugin updates, or when manually modifying theme files.
Step 1: Identify the Error
To fix a syntax error, you first need to know exactly where it is. Here are several ways to identify the issue:
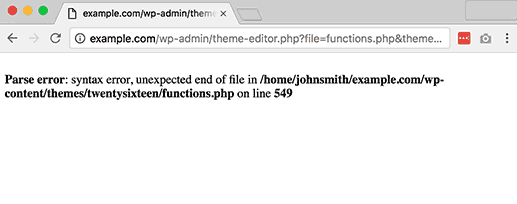
- Review the error message: When a syntax error occurs, WordPress or your server typically shows an error message indicating the file name and line number where the error happened.
- Enable WordPress debugging: Add the following lines to your
wp-config.phpfile to enable error display:
<?php

define('WP_DEBUG', true);

define('WP_DEBUG_DISPLAY', true);

?>
This will display detailed PHP errors on your site so you can find the problem location.
- Review the code manually: If you recently added or changed code, carefully check it for typos, missing characters, or syntax mistakes.
Step 2: Correct the Syntax Error
Once you locate the source of the syntax error, you can fix it by following these tips:
- Fix typos or missing characters such as semicolons, parentheses, or brackets that may be causing the error.
- Restore previous code: If you recently updated a plugin or theme and suspect it caused the issue, revert to the last known working version.
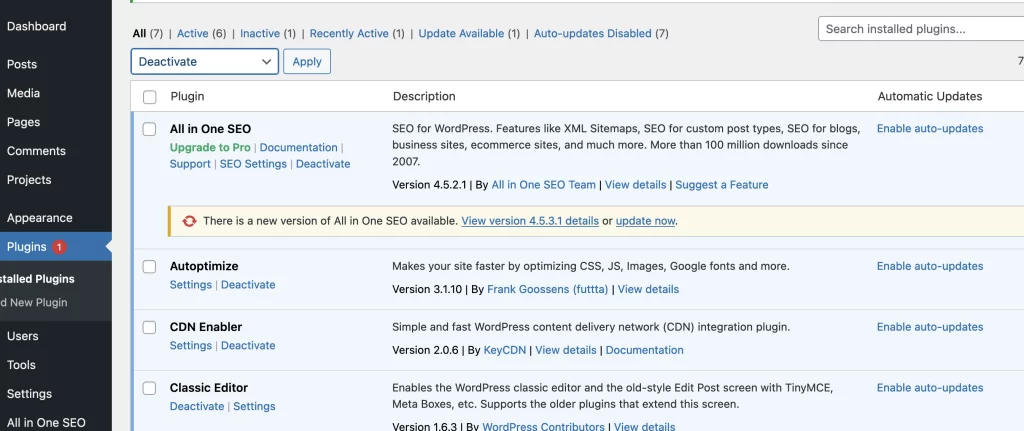
- Deactivate plugins: Disable all plugins by renaming the
pluginsfolder via FTP or your hosting file manager, then reactivate plugins one by one to find the faulty one.
Remember to always make backups before editing code files directly.
Step 3: Prevent Future Syntax Errors
To minimize syntax errors in the future, consider these best practices:
- Keep WordPress core, themes, and plugins up to date to avoid incompatibilities.
- Use a child theme when customizing theme code to prevent issues during updates.
- Test custom code on a staging site before deploying it live.
- Make regular backups so you can quickly restore if an error occurs.
- Use code editors with syntax checking to catch errors before uploading.
Following these steps will help keep your WordPress site stable and reduce downtime due to syntax errors.
FAQ
Q: What is the most common cause of syntax errors?
A: Missing semicolons or brackets, and typos in PHP code are the most frequent causes.
Q: Can I fix syntax errors without coding knowledge?
A: Basic errors can sometimes be fixed by restoring backups or disabling plugins, but deeper fixes usually require coding skills or developer help.
Q: How do I enable debugging safely?
A: Enable debugging on a staging site or add debug code temporarily, then disable it once the issue is resolved to avoid exposing sensitive info.
Sources
For more WordPress tips and guides, visit our Pressillion blog.