Here’s how to generate SSH Key on Windows with Putty.
As you become familiar with our platform, you might wish to utilize SSH and tailor your server or leverage our WPCLI to modify server configurations.
Please note that all SSH access is restricted to require an SSH key, and only the root user can use SSH.
How to generate SSH Key on Windows with Putty.
Download Putty and PuttyGen
This guide will assist you in generating and pushing a key.
You will need a Windows PC and the following software:
Putty:
- 32-bit: putty.exe
- 64-bit: putty.exe
PuttyGen:
- 32-bit: puttygen.exe
- 64-bit: puttygen.exe
Most users operate on a 64-bit Windows OS, but both versions should function on your PC.
Follow the written instructions below.
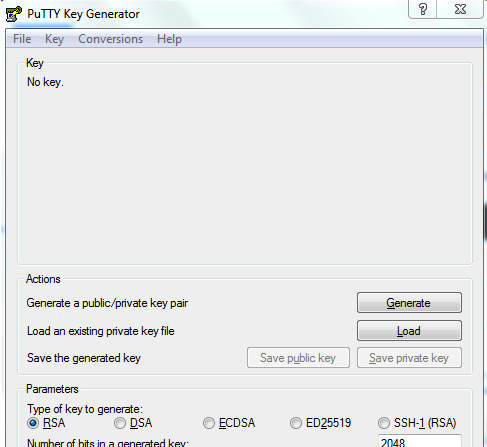
Step 1: Launch PuttyGen and Generate Key
Upon downloading PuttyGen, launch it and click “Generate”.
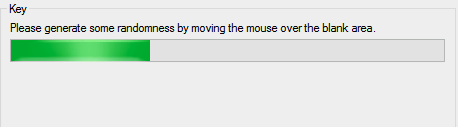
You’ll be prompted to move your mouse to generate the key.
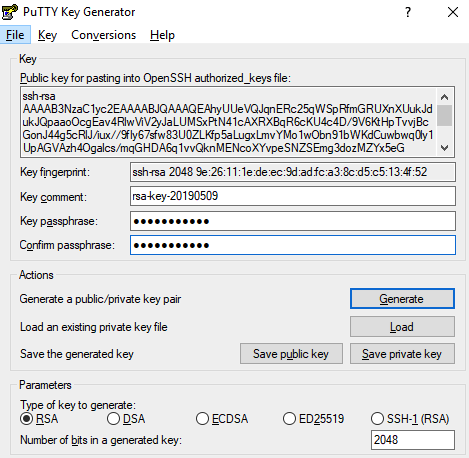
Step 2: Copy Your Public Key
Copy the public key into your Pressillion account.
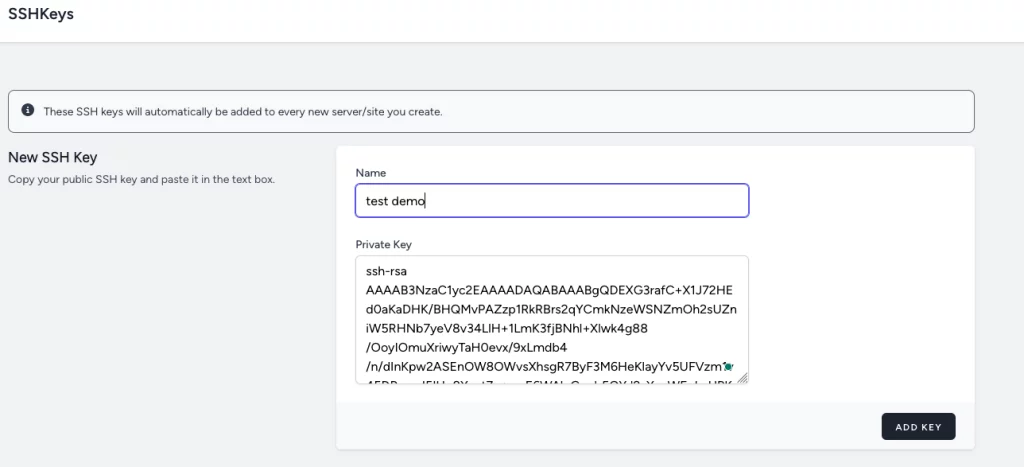
Step 3: Add Your Key to Pressillion
For a more detailed guide on adding your SSH key to Pressillion, refer to this article: Add/Remove an SSH Key to/from an Active Pressillion Server.
Step 3.1: Navigate to Your Settings Page
Log in to your account and click the “Your Settings” menu accessible by clicking on your username and icon.

Step 3.2: Add Your Public SSH Key to Pressillion
Find and click the “SSH Keys” option in the left horizontal menu. Paste your Public SSH Key into the “New SSH Public Key” panel and click “Add Key”. Name this key for root access to your server, for example, name it as the root key.
Once added successfully, it will appear in the Active SSH Keys panel.
Step 3.3: Add the Key to the Server
Access the Pressillion UI, navigate to the server, click on the SSH Keys tab, select the SSH key and add it to your server.
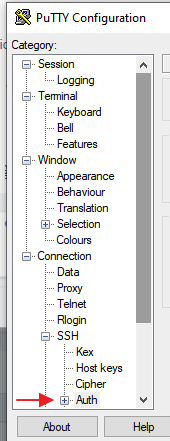
Step 4: Configure Putty and Connect to Your Server
Open Putty, go to Auth settings and browse to find the private .ppk file you saved. Click “Default Settings” and save to retain the selected key.
Add the server IP and connect.
Enter “root” as the login name when prompted.
If performed correctly, you should see the login prompt.
From there, you can use WP-CLI and customize files according to your preferences.